
Using hierarchy custom settings in validation rules
Custom fields could now be used in validation rules (indicated by $Setup). Learn how to set this up in your Salesforce org, so that it will work with the eperi sEcure Platform.
About this task
Important: Only fields accessible via the Salesforce REST API are supported
by the eperi sEcure Platform.
In the following example, a custom field with the data type "checkbox" is used to disable a validation rule. Using custom fields with other data types is also possible.
Procedure
-
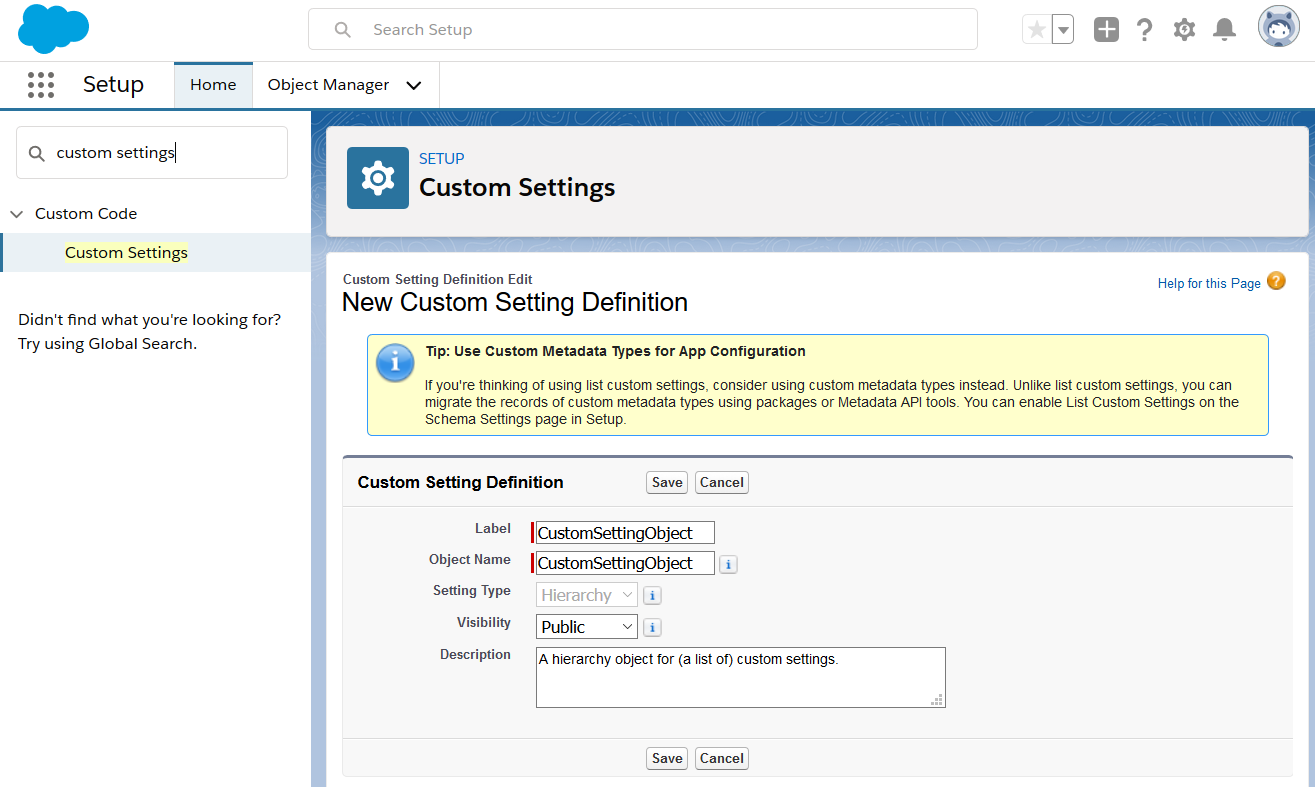
Enter the definition of the new custom setting, for example:
-
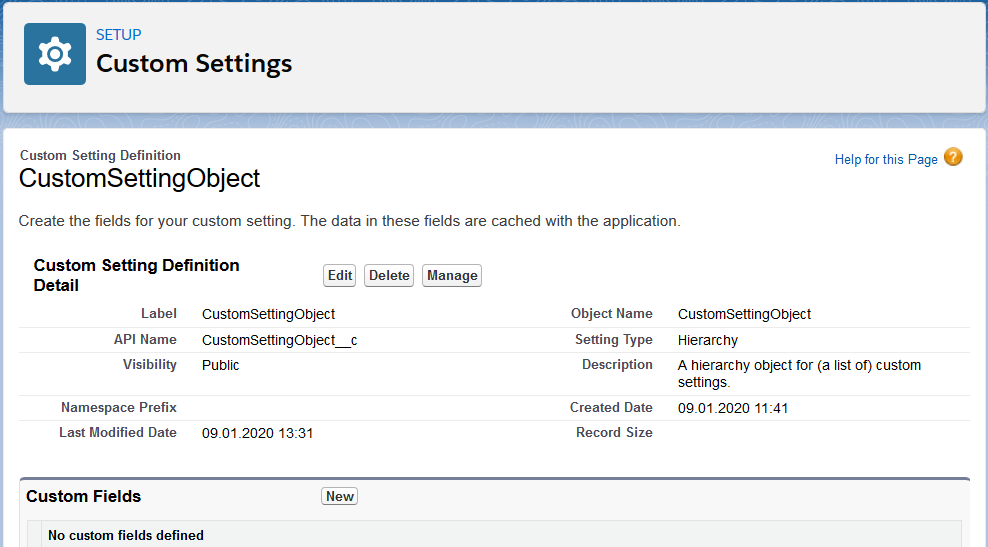
Click New (Custom Field):
-
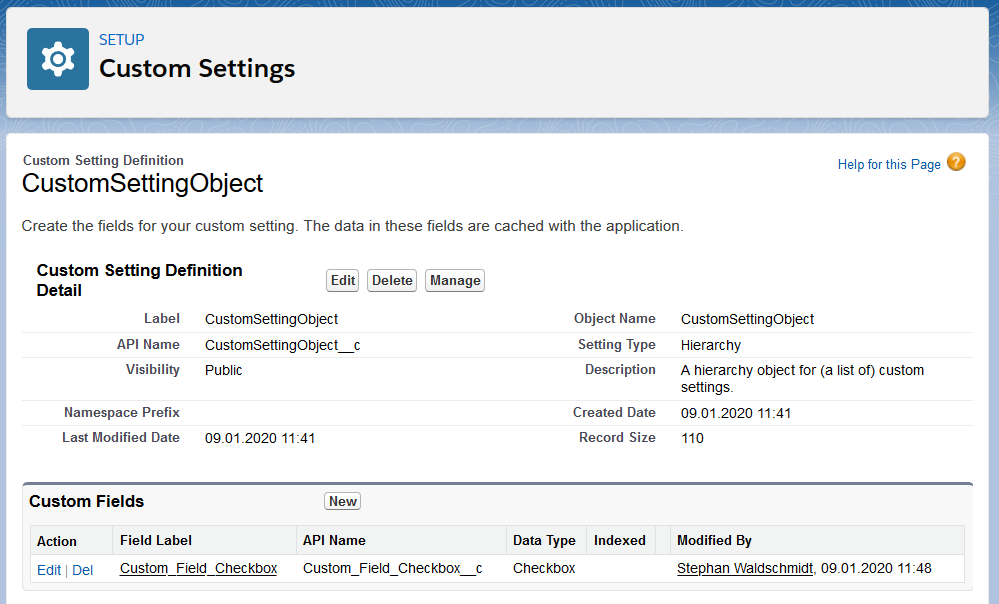
In the Custom Setting Definition Detail click
Manage:
-
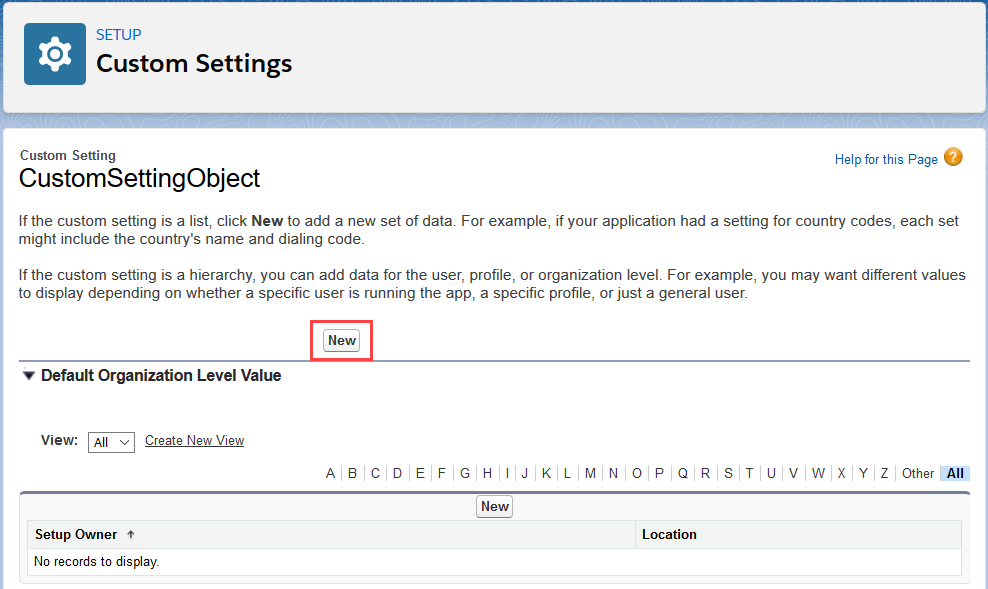
Click New to add a new set of data:
-
Click Save:
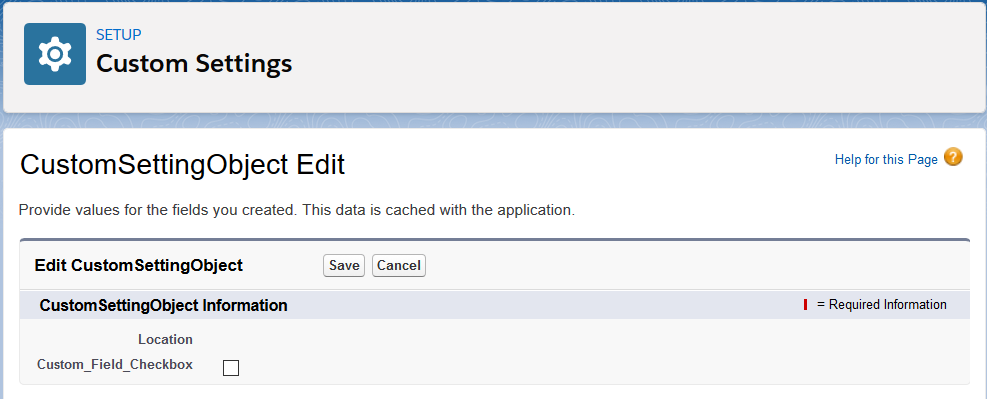 Since you left the checkbox unchecked, the value of the field should be false. You could check this in the Salesforce Workbench.