Configuring the REST Protection Reverse Proxy in eperi sEcure Platform
Configure the eperi sEcure AnyApp REST-based in the eperi sEcure Platform.
Procedure
-
In the Apps tab click +New in the
upper right corner:
Figure 1: Admin Console - New App 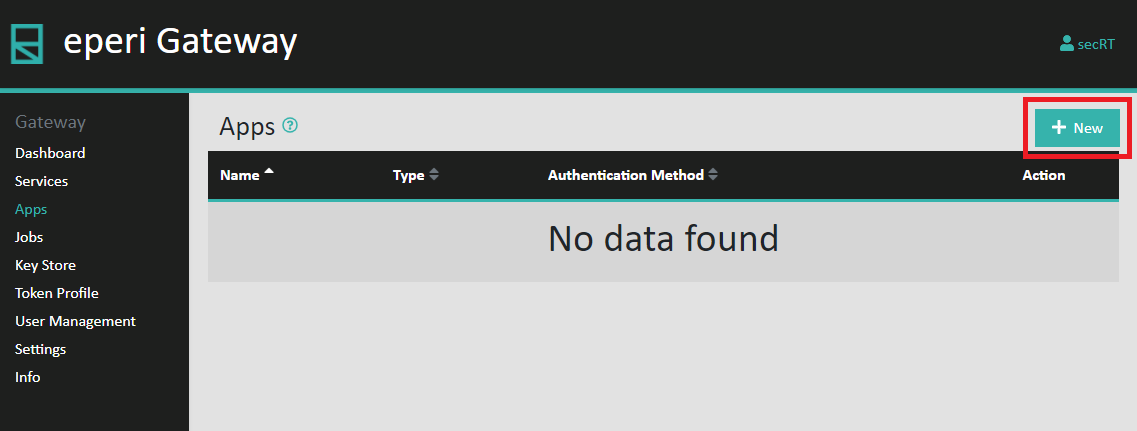
-
In the pop-up select REST Protection Proxy as app
Type and enter an app Name of
your choice. Provide the required information, then click
Submit.
Figure 2: Configure App 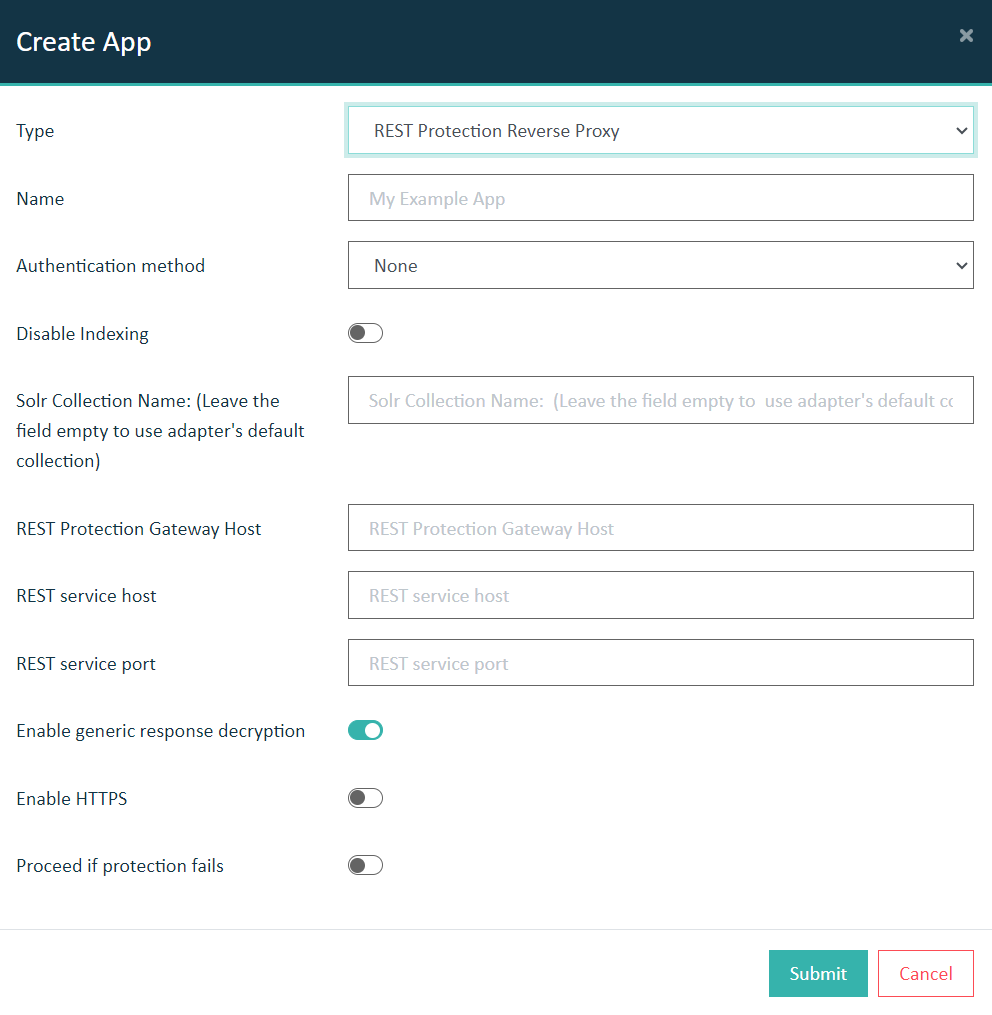
Disable Indexing: Activate to disable indexing (e.g. if you don't have Solr).
Solr Collection Name: Enter the Solr collection name where your data will be indexed.
REST Protection eperi sEcure Platform Host: Enter here the hostname of this gateway
REST service host: Enter here the hostname of the REST service you usually use
REST service port: Enter here the port of the REST service you usually use
Enable generic response decryption: Encrypted/tokenized fields will be returned unprotected.
Enable HTTPS: If you want to secure the communication channel between the proxy and the existing API endpoint via TLS, download the server certificate, import it into the eperi sEcure Platform truststore and activate this switch. See the eperi sEcure Platform Administrator Manual for details how to do this.
Proceed if protection fails: Log errors without aborting.
CAUTION: This can lead to unprotected clear text in the result! -
Select the Services tab and navigate to
Proxies. Create a new Proxy by clicking on
+New.
Figure 3: Admin Console - New Proxy 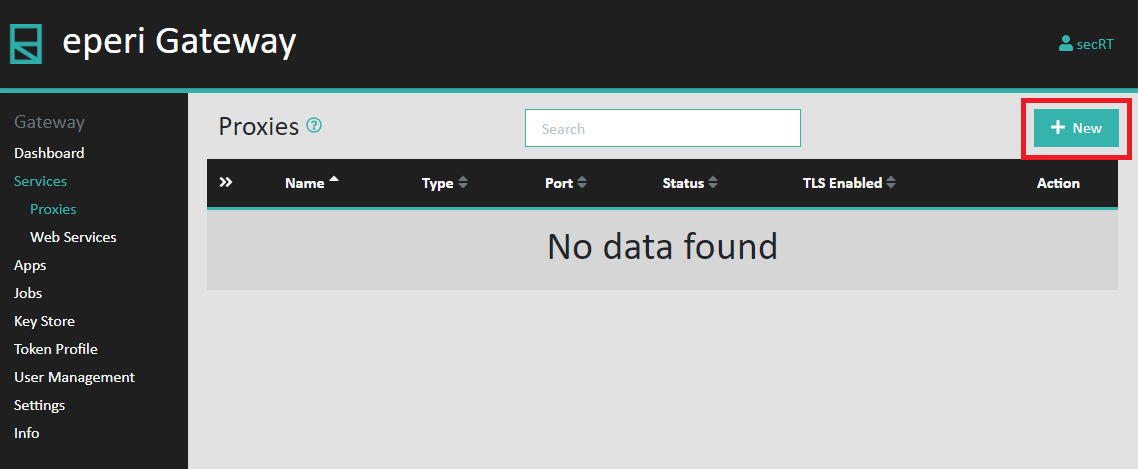
-
In the Create Proxy dialog, provide a Name of your choice and select Reverse as the proxy Type.
Enter an available Port, then click Submit.
Figure 4: Proxy configuration 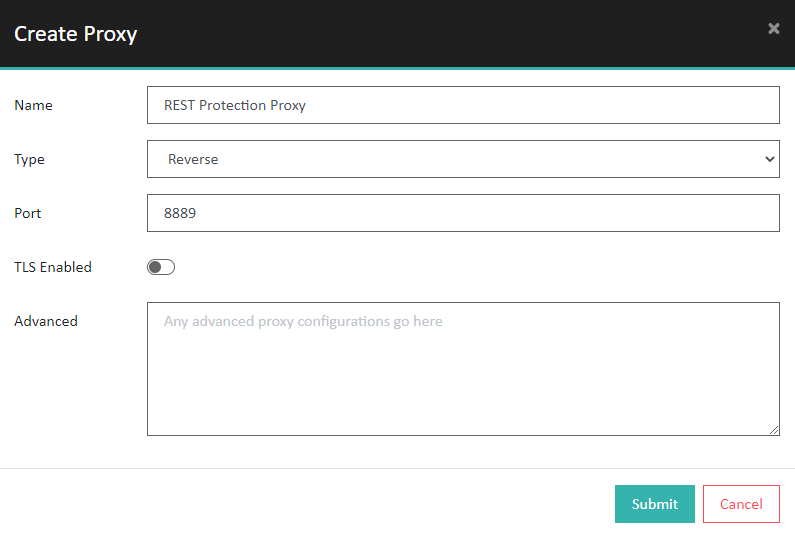
TLS Enabled: If you want to secure the communication channel between client and proxy via TLS, download the eperi sEcure Platform certificate, import it into your client and activate this switch.
-
Back to the proxy overview click Assign Apps.
Figure 5: Assign Apps 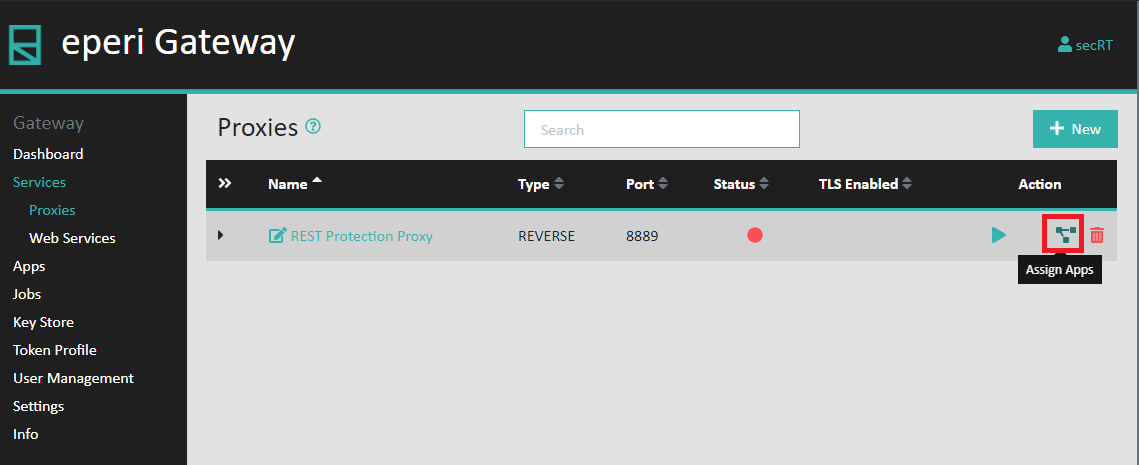
-
In the pop-up select the REST Protection Example app
created in step 3 and then click Assign.
Figure 6: Assign App 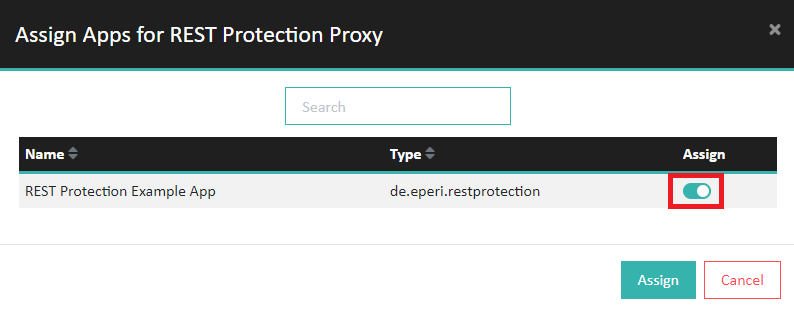
-
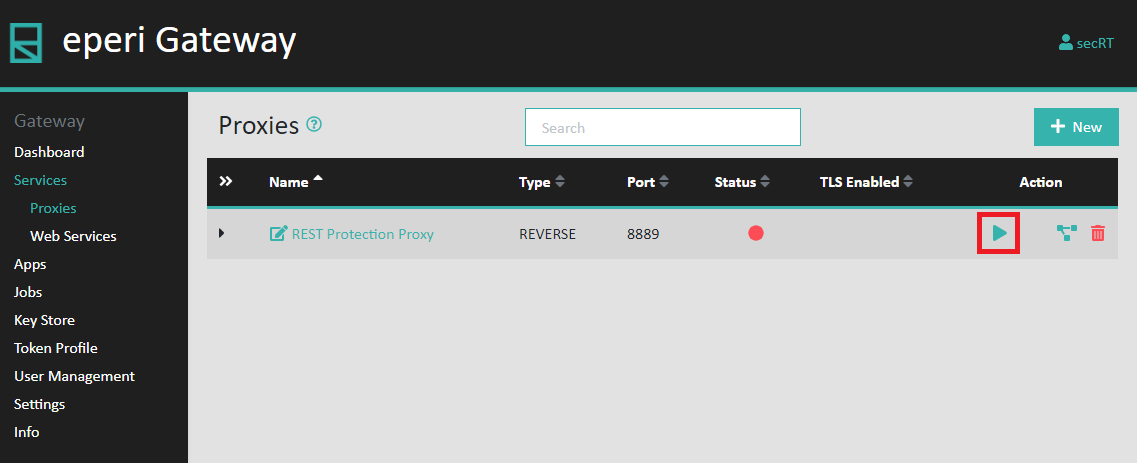
Back to the proxy overview click the Start Button to
start the proxy.
Figure 7: Start Proxy