
Configuring Postfix as Email Relay in Salesforce

Configure Postfix as Email Relay in Salesforce.

Procedure

  1. In your Salesforce org, configure the Email Relay Activation as follows:
    1. Log into to your Salesforce org as administrator.
    2. In your Salesforce org, click the gear symbol in the upper right corner of the page, then click Setup.
      Figure 1: Salesforce org - Setup
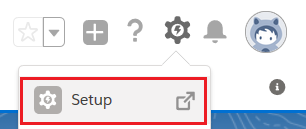
      Salesforce org - Setup
    3. In the Setup page, find the section ADMINISTRATION in the menu on the left side, then click Email > Email Delivery Settings > Email Relays.
    4. Click Create Email Relay.
    5. In the field Email Host, enter the hostname of the Postfix SMTP Relay, e.g. mail.secure-sf.com.
    6. Keep the value 25 in the Port field.
    7. In the field TLS Setting, choose Off.
    8. Click Save.
      Figure 2: Configuring the Email Relay Activation
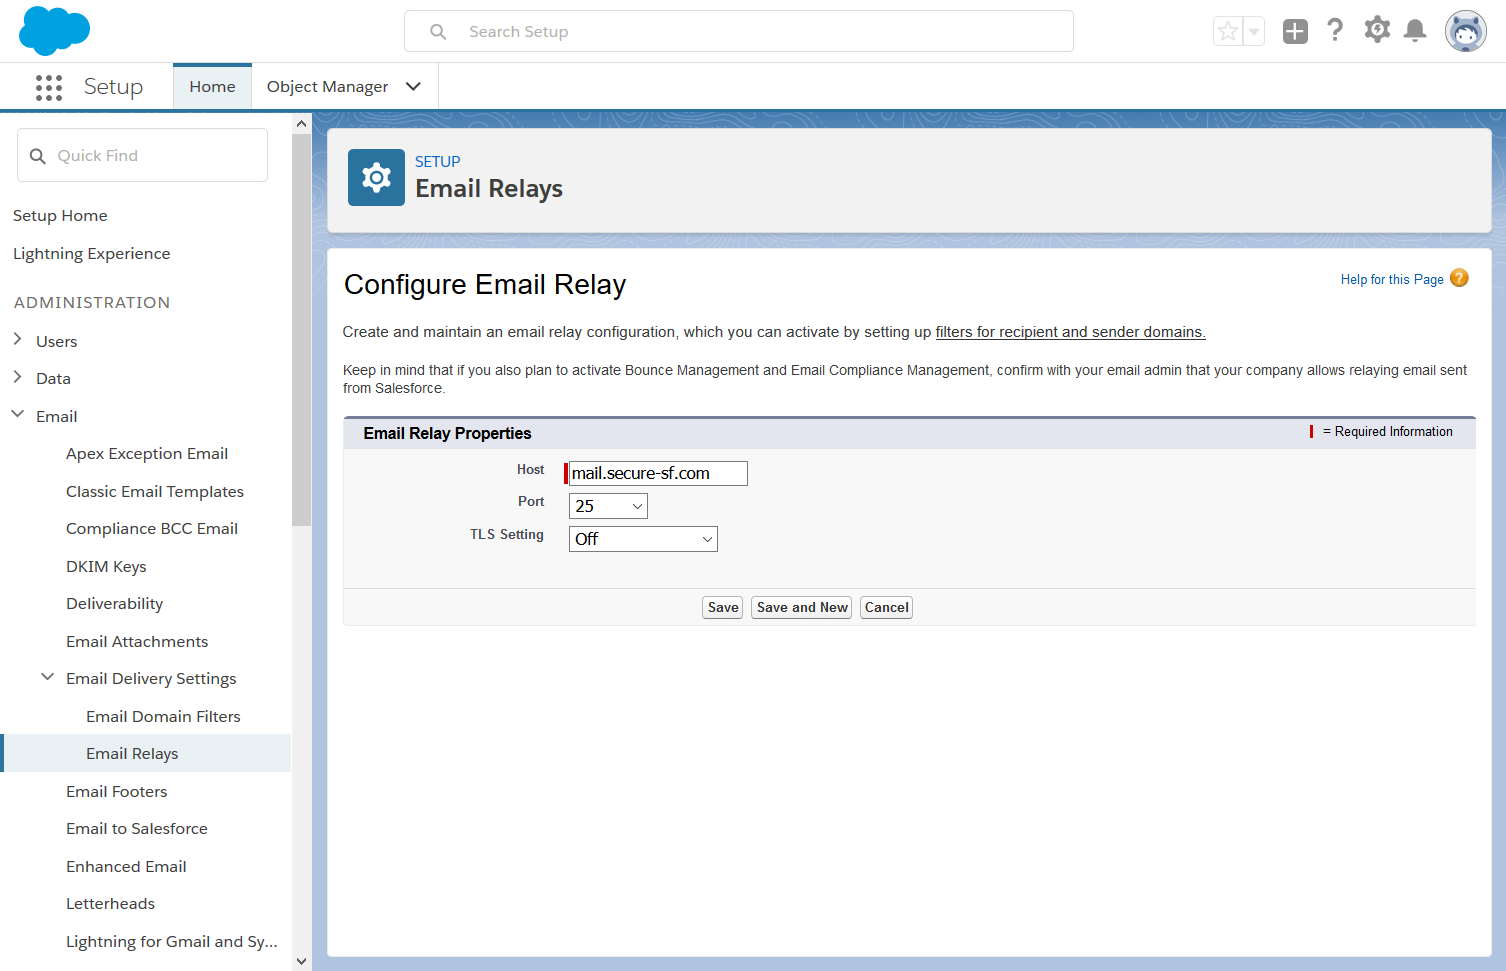
      Configuring the Email Relay Activation
    9. Log out from your Salesforce org.
  2. In your Salesforce org, configure an Email Domain Filter to enable the Email Relay as follows:
    1. In the Setup page, find the section ADMINISTRATION in the menu on the left side, then click Email > Email Delivery Settings > Email Domain Filters.
    2. Click Create Email Domain Filter
    3. In the fields Sender Domain and Recipient Domain enter * and in the field Email Relay, select your previously configured Email Relay.
    4. Enable the Active checkbox and click Save
      Figure 3: Configuring the Email Domain Filter
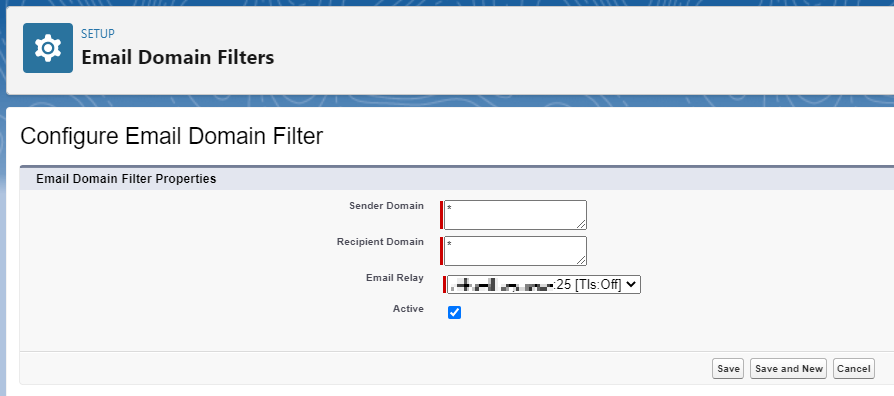
      Configuring the Email Domain Filter
  3. If you have configured that the e-mail address in the User object should be tokenized, set up an additional MX record in the DNS for the domain configured in the Email Tokenizer, such as:
    tok.yourdomain.com	MX preference = 10, mail exchanger = relay.yourdomain.com

Results

You have successfully configured Postfix as Email Relay in Salesforce.