
Setting up the REST endpoint configuration
For each data field, it is necessary to set up which data protection policy should be applied.
Before you begin
About this task
Procedure
-
Select the Configuration tab and click on +New.
Figure 1: New Configuration 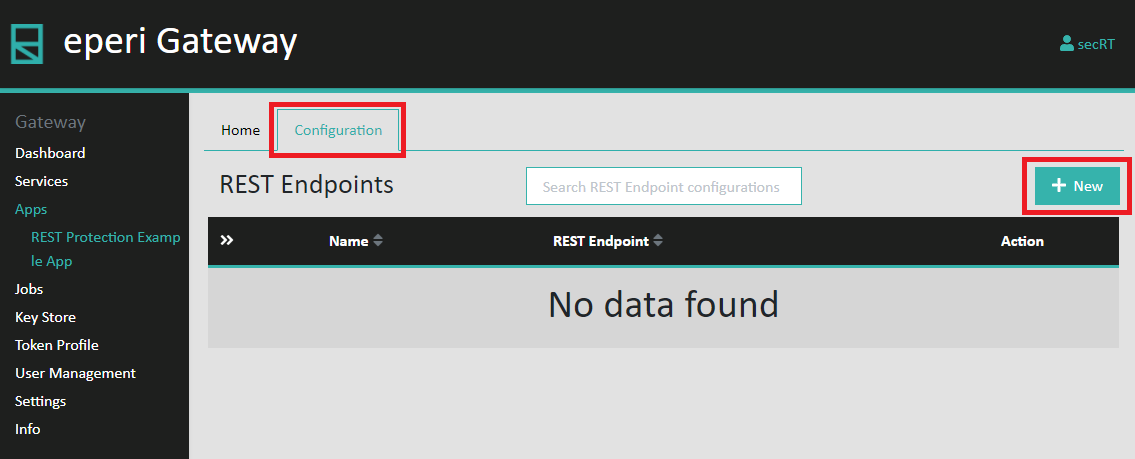
-
In the pop-up menu provide the required information and then click Submit
Figure 2: New Endpoint 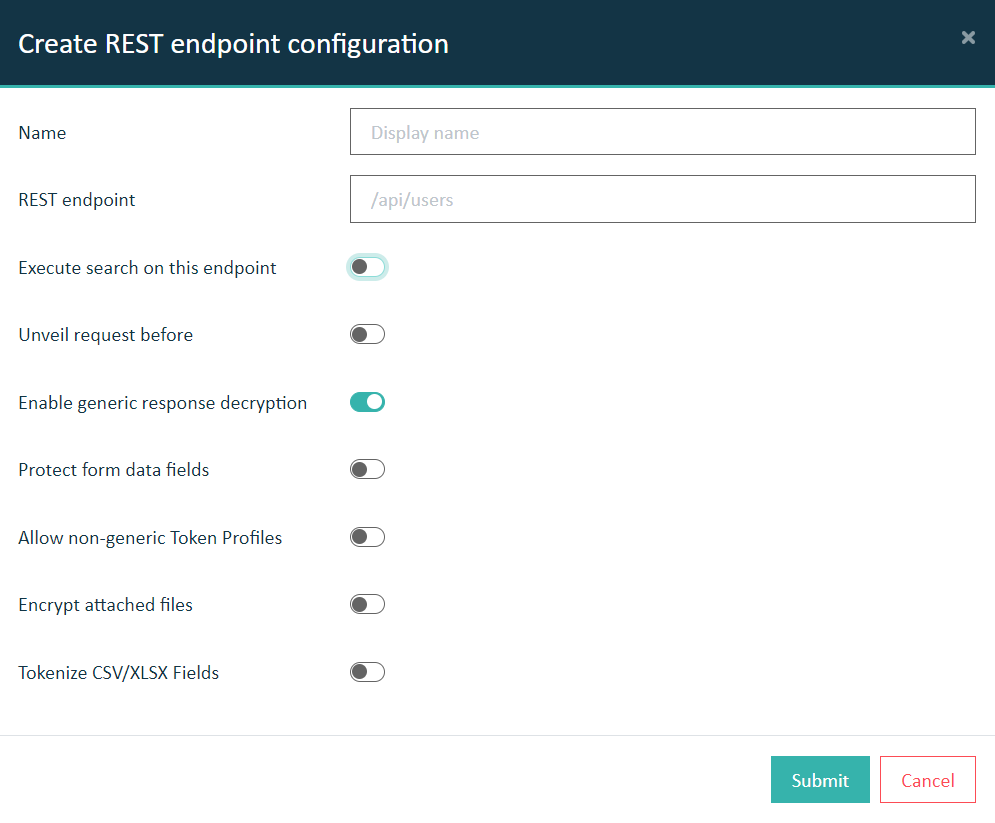
Option Description Name Provide a name of your choice for the endpoint. REST endpoint Provide the endpoint you want to protect. To support protection for endpoint containing path parameters, configure the endpoint with a regular expression instead of the path parameter (e.g., [A-Z0-9]{5,10} for an uppercase alphanumeric parameter 5 to 10 characters long.) Unveil request before Set the switch on to enable detokenization of the request's JSON Body. Enable generic response decryption Set the switch on to enable generic decryption of incoming responses for this particular endpoint. Protect form data fields If the incoming Request has the content type application/form-data, switch this option on to enable protection for the incoming fields. Allow non-generic Token Profiles Switch this option on to enable non-generic tokenization. Encrypt attached files Switch this option on to encrypt files attached to the request. Tokenize CSV/XLSX Fields Switch this option on to tokenize the fields contained within CSV files attached to the request. -
Enable wildcard search
If the switch Execute search on this endpoint is enabled, two additional input fields for configuring search will be available.
Figure 3: Execute search on this endpoint 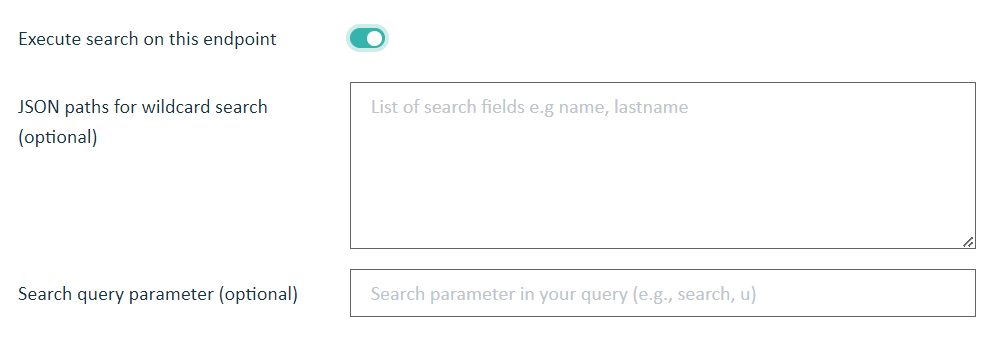
Confirm your input with the Submit button.Option Description JSON paths for wildcard search (optional) Provide the paths to the fields on which wildcard search should be executed upon data which has been indexed (e.g., data.fullName, data.email). Note: Each configured wildcard search field will be used for querying the index for records matching the field name and given value. Afterwards, the search string in the original request body will be replaced by an array including all the tokenized results to be processed by the Target API.Search query parameter (optional) Provide the name of the search parameter that references the search value in the query. (e.g., search, q) -
Allow non-generic Token Profiles
If the switch Allow non-generic Token Profiles is enabled, generic decryption will be disabled and an additional Additional GET endpoints input field is available. You can enter multiple GET endpoints, one per line, where this specific JSON body is expected to be present in the responses. This enables you to choose from a number of additional Token Profiles, e.g., the date tokenizer or the number tokenizer.
Figure 4: Allow non-generic Token Profiles 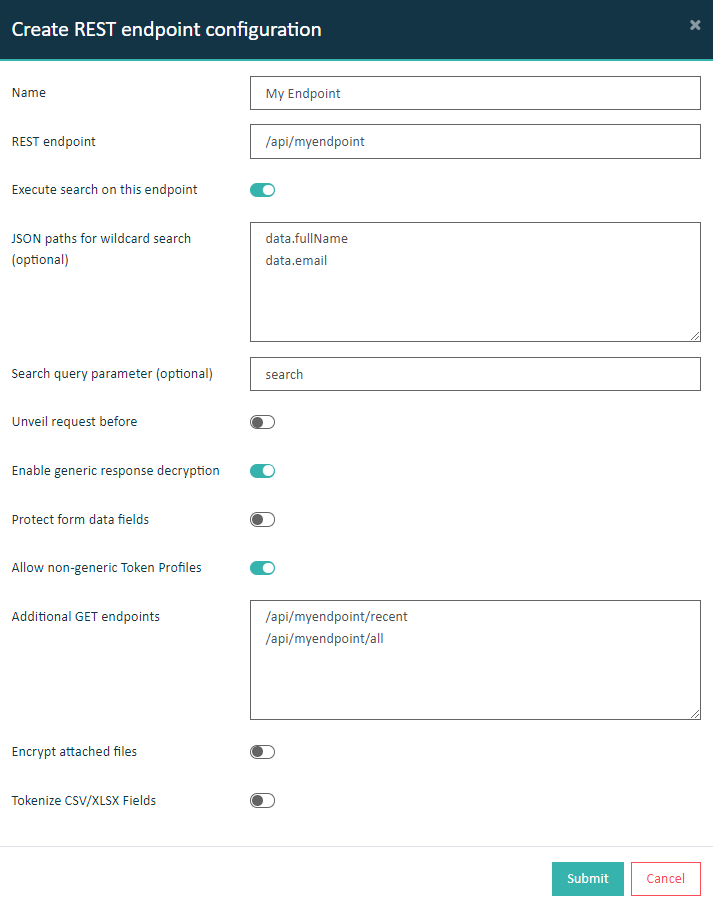
-
Encrypt attached files
If the switch Encrypt attached files is enabled, an additional option for tokenizing file names will appear. Switching on Tokenize encrypted file name will also tokenize their file names.
Figure 5: Encrypt attached files and optionally tokenize their names 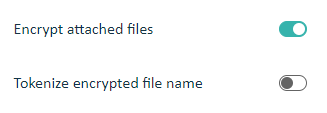
-
Tokenize CSV/XLSX Fields
If the switch Tokenize CSV/XLSX Fields is enabled, a set of input fields will appear, which concern the structure of CSV/XLSX files. Fill the fields according to the specifications, which describe the attached file inside the incoming Request.
Figure 6: Tokenize CSV/XLSX Fields 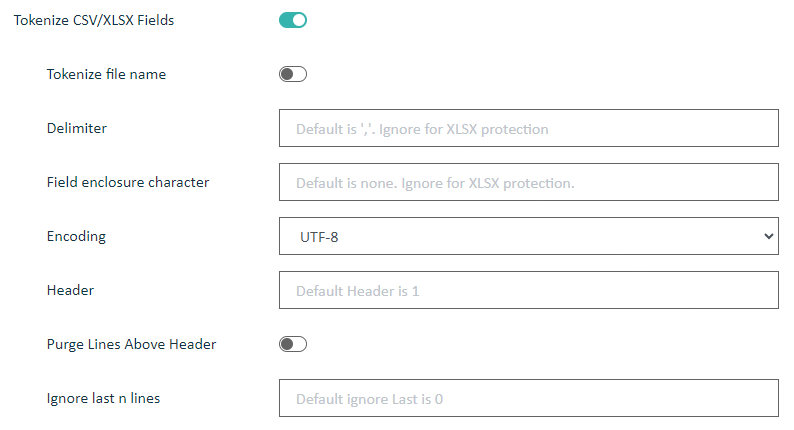
Confirm your selections with the Submit button.Option Description Tokenize File Name If switched on the name of the file will be tokenized. Delimiter Provide the character that is used for separating fields in the attached file. Field Enclosure Character Field enclosure character (e.g., " for cases where field values might contain the field delimiter character like "a, b, and c"). Encoding Select the encoding of your CSV files. UTF-8 and UTF-8-BOM are supported. Header Enter the line number of the header in your CSV files. Purge Lines Above Header If switched on, lines above the header will be purged upon tokenization and will no be present after forwarding the protected file. Ignore last n lines Provide the number of lines at the end of CSV files that should not be tokenized or encrypted.
-
Enable wildcard search
-
From the Configuration tab, select (+) Add new field configuration to endpoint to configure a new field to protect
Figure 7: New Field Configuration 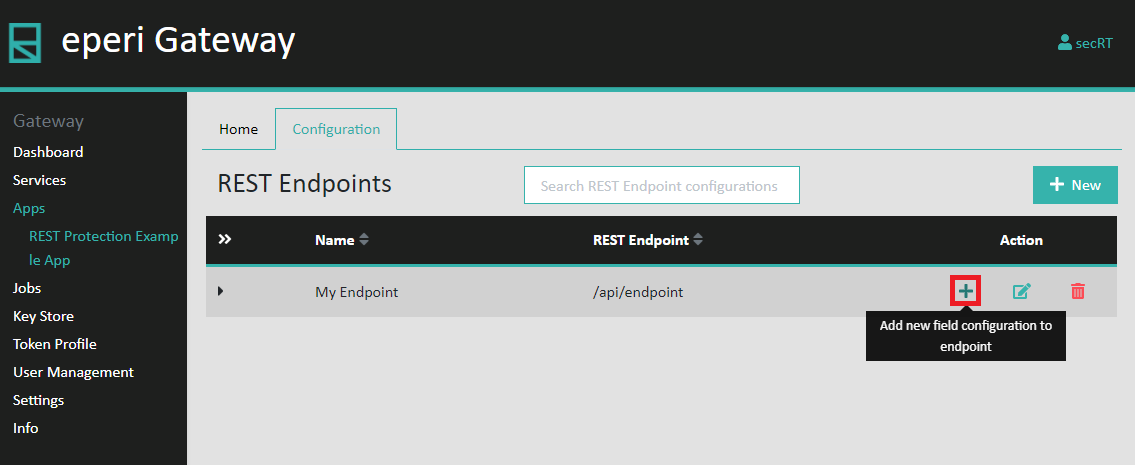
-
Select the appropriate Payload type and enter a valid Path to the key in your request body.
Provide a Regex Validation Pattern and Replacement Text if needed.
If your protection method is tokenization, select a Token Profile, then
click Submit.
Note: For more details about JSON Path, see the official documentation: JSON Path on GitHubNote: For more details about XPath, see XPath SyntaxNote: For a tutorial on regular expressions, see Regex 101
-
Choose the Payload type from the dropdown list.
Figure 8: List of currently available payload types 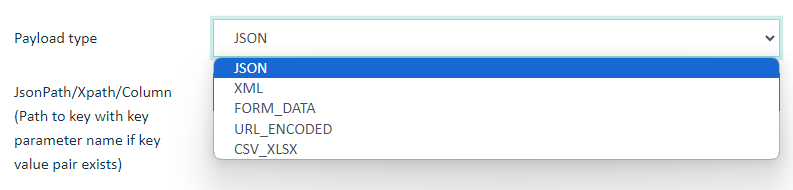
-
Endpoint configuration with encryption
Important: If you want to use search functionality, you will need to select tokenization as your protection method.Select Encryption as method if you want your data to be encrypted.
Figure 9: Details for endpoint configuration with encryption 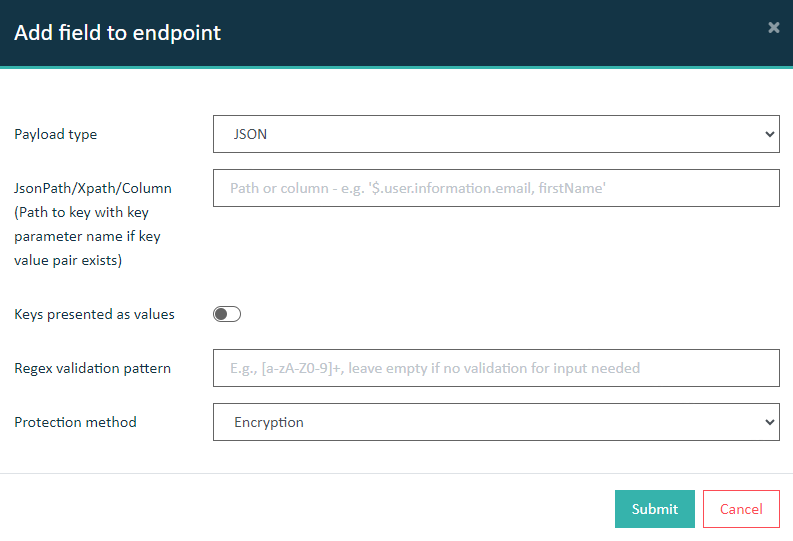
-
Endpoint configuration with tokenization
If you want your data to be tokenized, select Tokenization as your protection method and choose a token profile from the dropdown below.
Figure 10: Details for endpoint configuration with tokenization 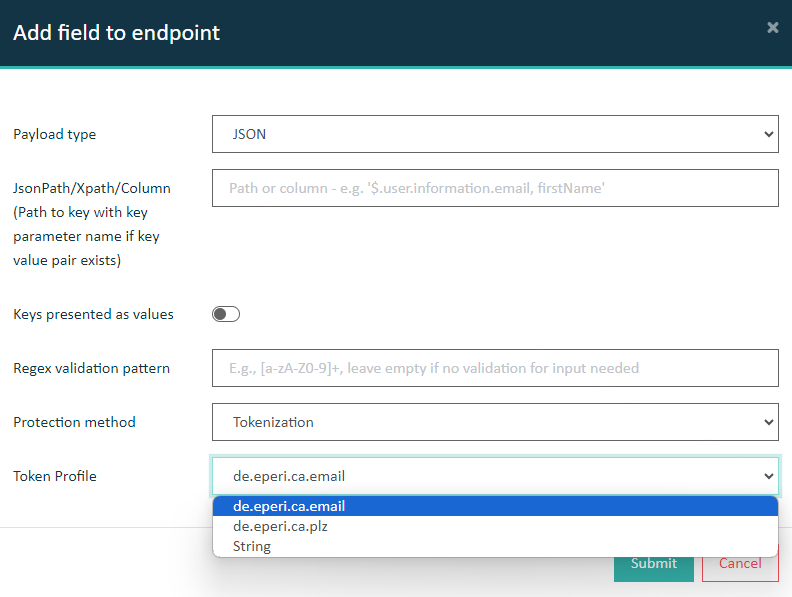
-
Endpoint configuration with input validation.
Provide a regex pattern if you want your input data to be validated before tokenization/encryption. If the validation fails, the input data will be forwarded without protection. Alternatively, you can enable Use Static Replacement. In this case, instead of forwarding the unprotected data, the value from the field Replacement Text is sent to the target API.Note: The Use Static Replacement toggle switch will only appear if a Regex Validation Pattern is present. Replacement Text field will only appear if the Use Static Replacement option is enabled.
Figure 11: Details for endpoint configuration with input validation 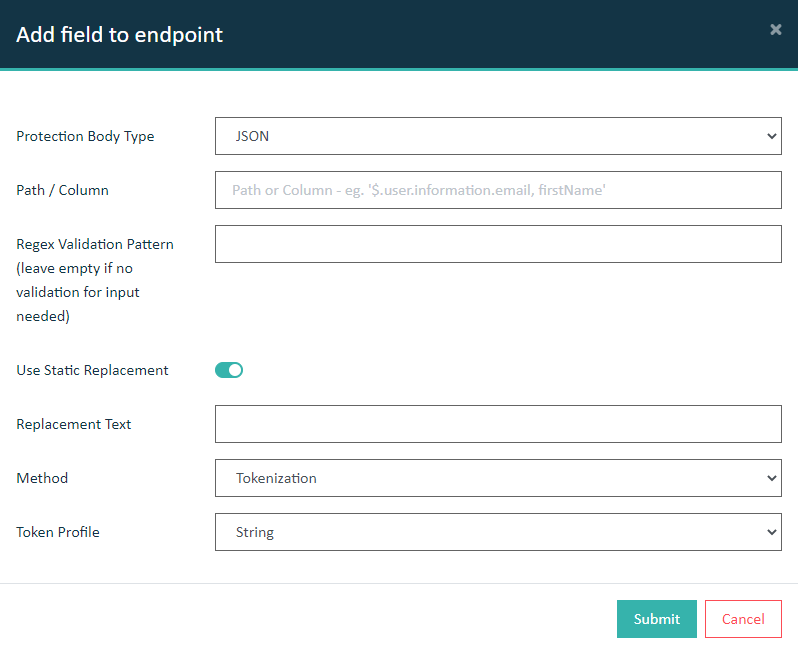
-
Endpoint configuration with keys presented as values JSON structure.
If the target application uses a JSON structure where the key and value are defined as separate JSON paths, such as:
the Keys presented as values toggle should be switched to On. This will activate the additional field Path for Value. In this state, the JsonPath/Xpath/Column (Path to key with key parameter name if key value pair exists) should contain the path to the key (including the name of the key) and Path for value should contain the path to the value. In the following example, the JsonPath $.field[*].key.firstName represents the first element of the first JSON object in the field array of the JSON object shown above. However, Path for value includes only the "key" portion (in this case, the string value, i.e., $.field[*].value) of the second element of each of the JSON objects of the field array. This configuration ensures that the value retrieved from the JsonPath $.field[*].value will be protected if the JsonPath $.field[*].key delivers the result firstName."field": [ { "key": "firstName", "value": "Muster", }, { "key": "lastName", "value": "Mustermann", } ]Figure 12: Details for endpoint configuration with inputvalidation 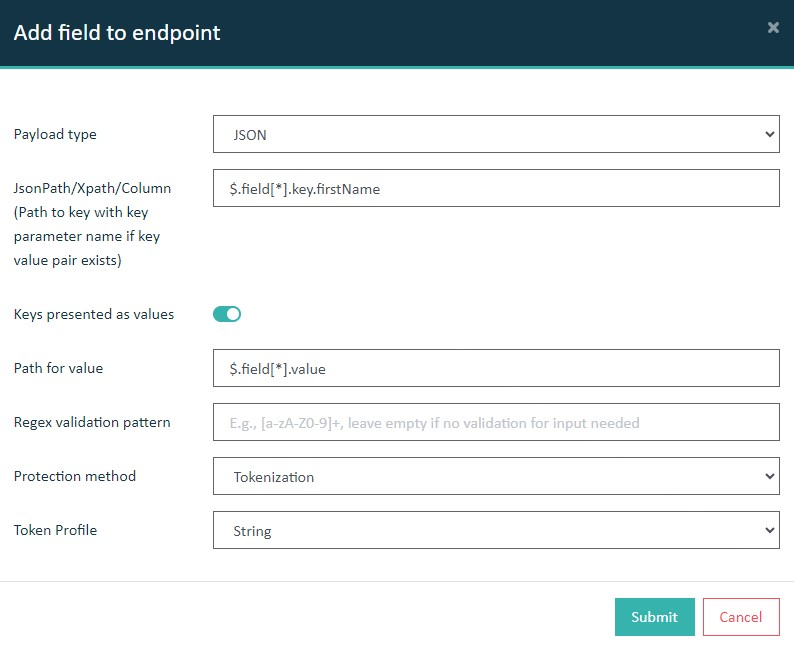
-
Mapping for CSV/XLSX Field Tokenization
Select CSV_XLSX as Payload type and provide the name of the column from the target CSV/XLSX file (case-sensitive) as JsonPath/Xpath/Column (Path to key with key parameter name if key value pair exists), that should be protected.
Figure 13: Details for endpoint configuration for CSV Field Tokenization 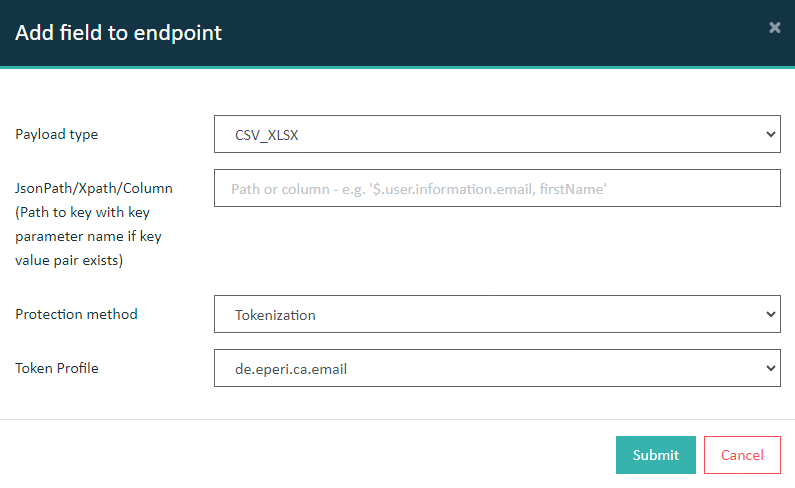
-
Turning on Capitalization parsing for string inputs
If the Enable Option for Input String Capitalization under Advanced Setting is switched on, selecting a token profile of type String will activate the toggle switch Capitalize string values before protection. If the toggle switch is set to true, the string inputs will be parsed to a Start Case form where first letter of every word will be capitalized if the words are separated by space or hyphen (-).
Figure 14: Details for endpoint configuration for String Input Capitalization 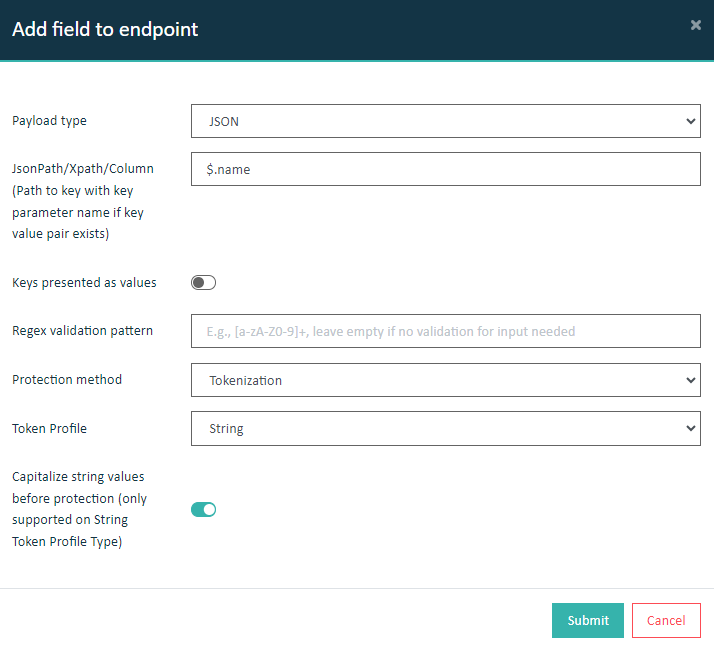
-
Choose the Payload type from the dropdown list.
-
The field is configured.
See your configured fields per endpoint by expanding the row.
The existing fields will be displayed with an indication whether there is an input validation present or not, along with their respective payload types.
Figure 15: Expanded Row 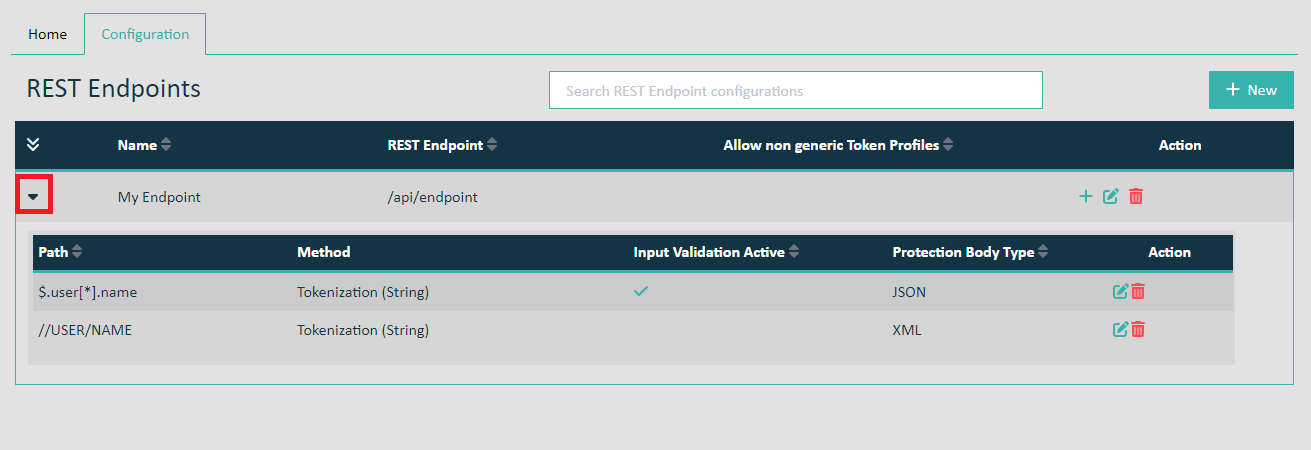
Results
| Action | Description |
|---|---|
| Edit | Change the configuration, e.g. add or delete endpoints and fields, change the search parameter. |
| Delete | Delete the whole policy setting. |
| Edit Field Configuration | After expanding the row, click on edit button to change the JSON Path or the method of protection of your existing field configuration. |
| Delete Field Configuration | After expanding the row, click on delete button to delete an existing field config. |