
Enabling and configuring On-Demand Email-to-Case
Enable and configure On-Demand Email-to-Case in your Salesforce org.
Before you begin
About this task
Note: In Salesforce's verification process of a support email address an email with a
verification link is sent from Salesforce to the specified address. To make sure
this link can be clicked, it is necessary to temporarily map an accessible email
address. Below the process is described step by step.
Procedure
- From Setup, enter Email-to-Case in the Quick Find box, and select Email-to-Case.
-
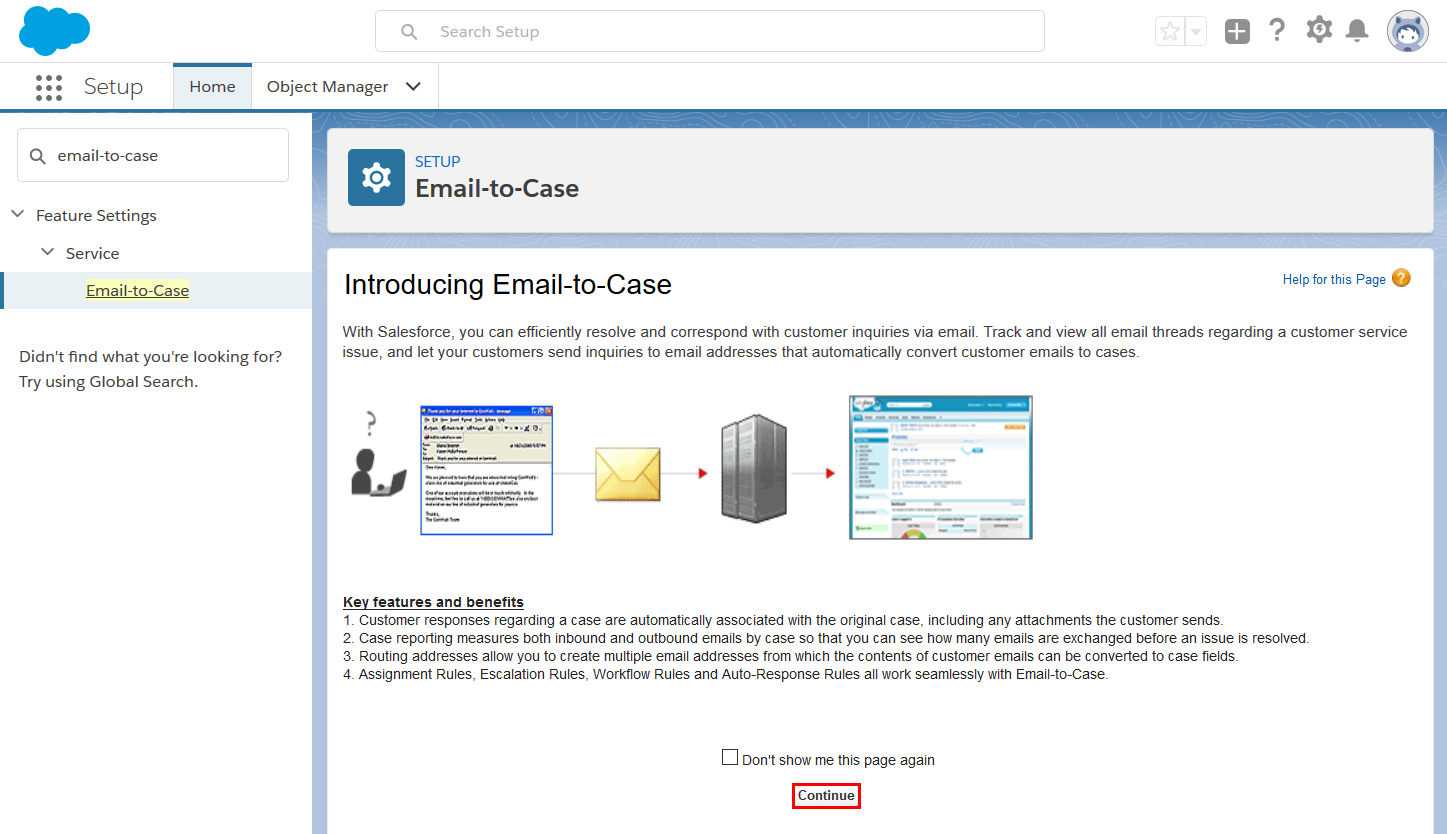
In the initial page Introducing Email-to-Case click
Continue.
Figure 1: Email-to-Case initial page
-
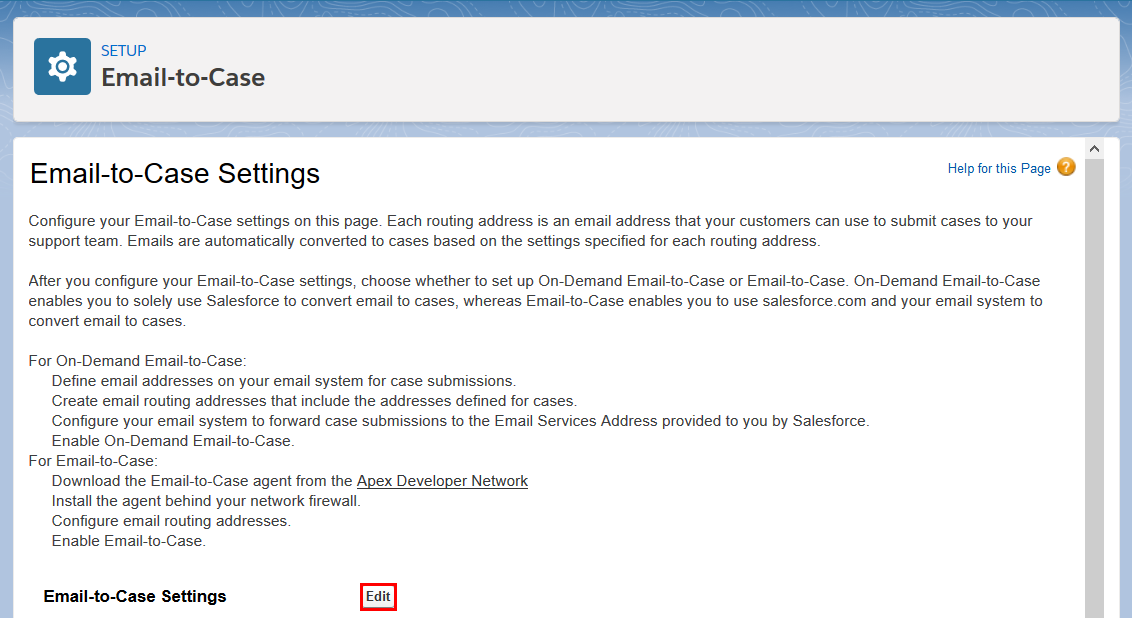
In the Email-to-Case Settings overview page click
Edit.
Figure 2: Email-to-Case settings overview page
-
In the next page Email-to-Case Settings configure the
settings as shown in the example below:
Figure 3: Email-to-Case settings page
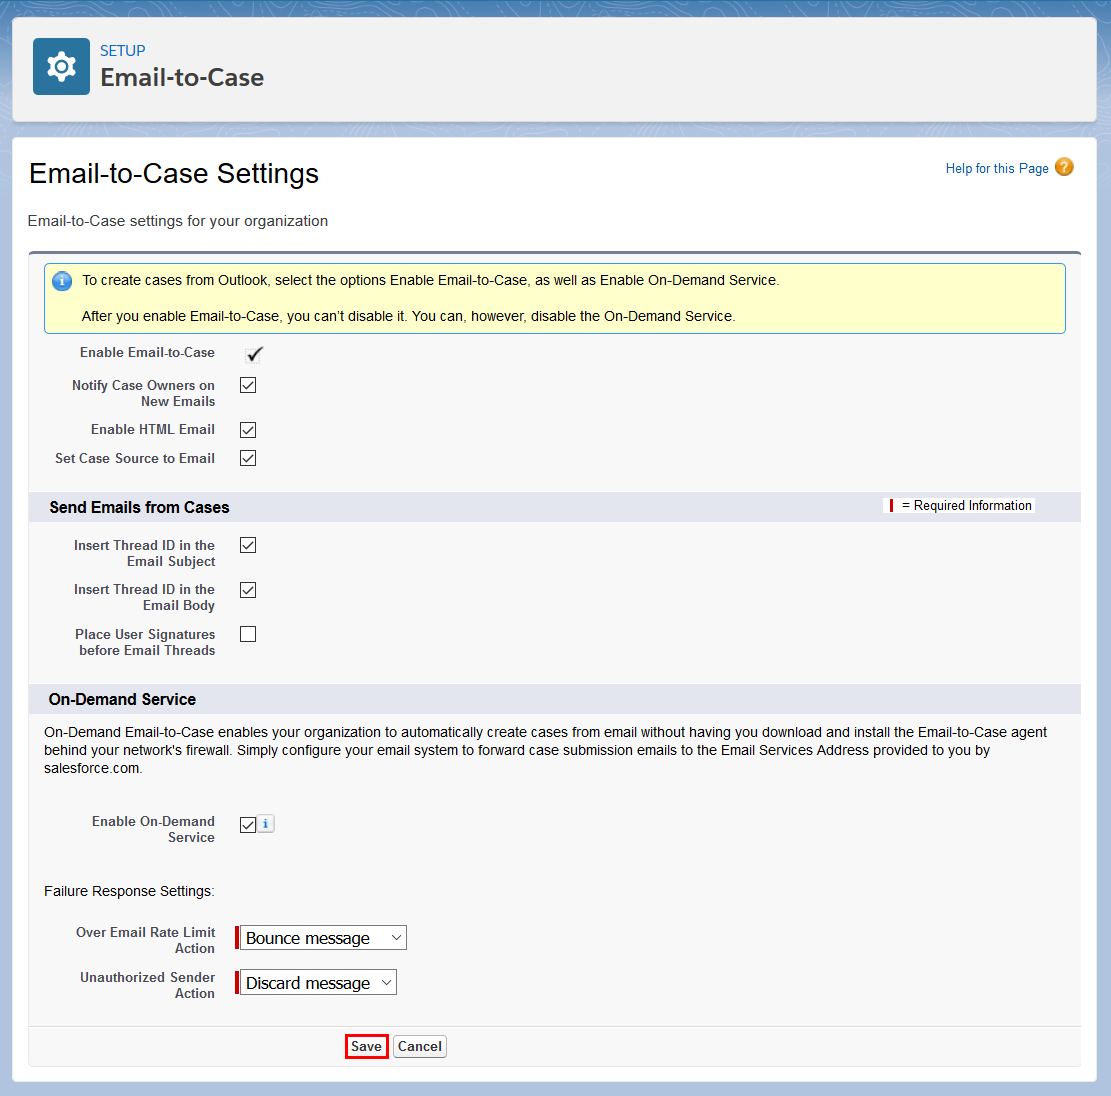
- Click Save.
-
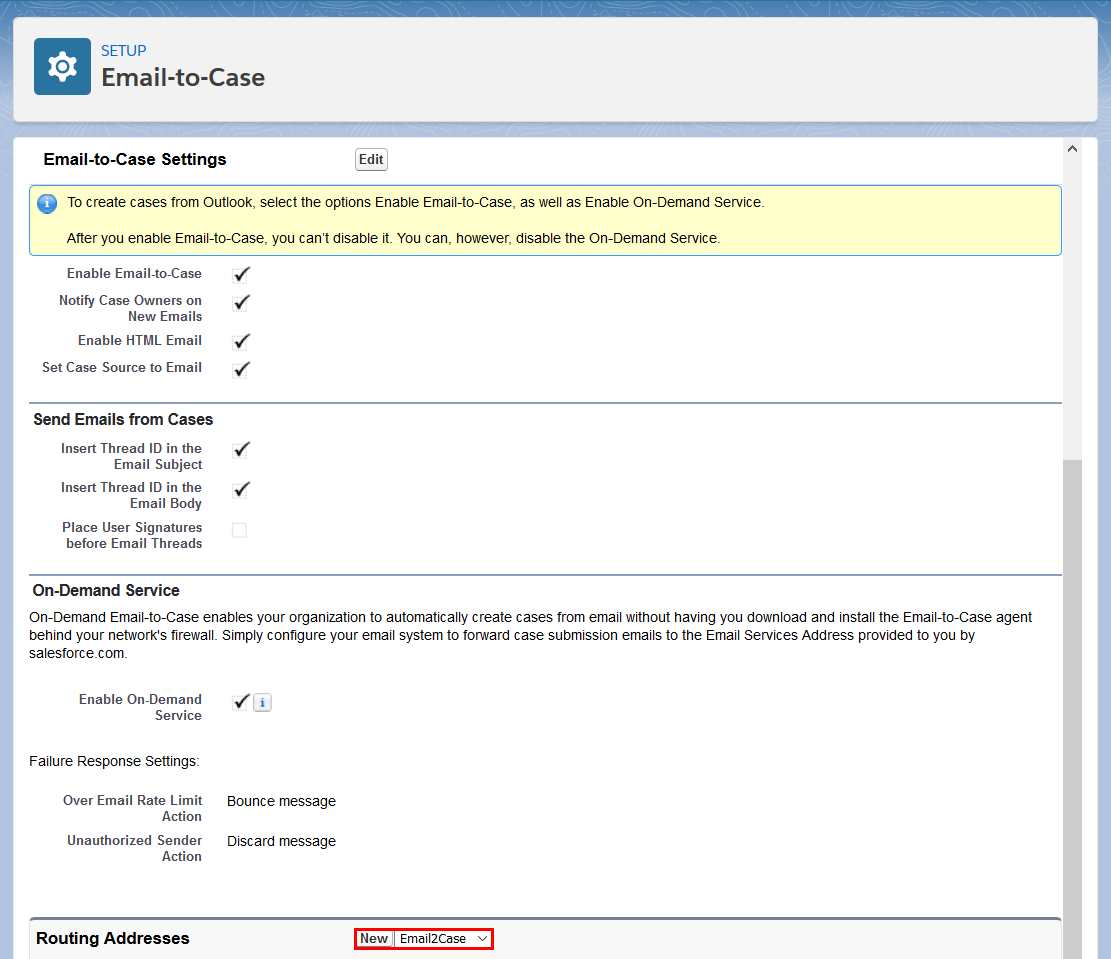
In the section Routing Addresses at the end of the
Email-to-Case Settings overview page click
New (Email2Case).
Figure 4: Email-to-Case settings page - New Routing Address
-
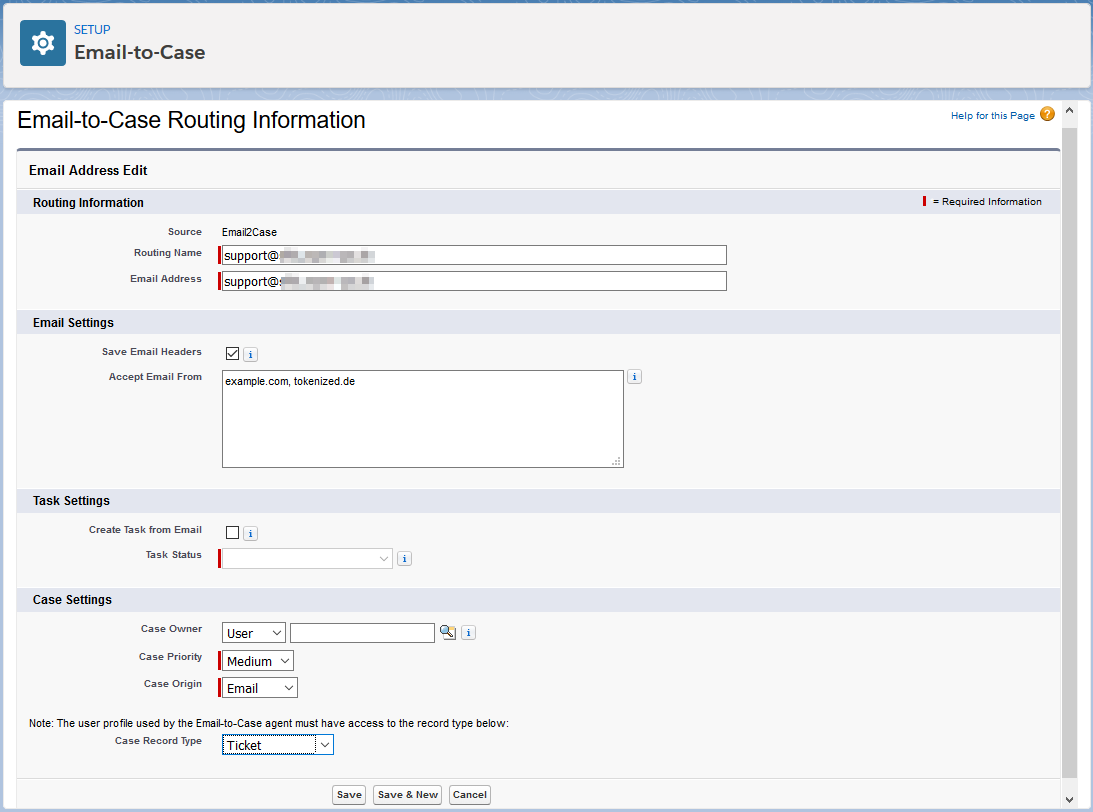
In the page Email-to-Case Routing Information configure
the settings as shown in the example below:
Attention: If you limit the email addresses or domains via the Accept Email From field, please additionally enter the domain name specified in the email token profile. This is required for the eperi sEcure Platform to process On-Demand Email-to-Case properly. Or leave this field blank if you want On-Demand Email-to-Case to receive email from any email address or domain.
Figure 5: Email-to-Case Routing Information page
-
Before you click Save, follow these steps:
- Connect to the server where the Postfix SMTP Relay is installed using your preferred ssh tool (e.g. putty) and log in.
- Change to the folder /etc/postfix/
- Create and edit a new file named recipient_canonical
-
Temporarily map an email address whose mailbox you can access, for
example john.doe@example.com to the
Email Address configured in the
Email-to-Case Routing Information page. For
example:
/^support@mydomain[.]tld$/ john.doe@example.comImportant: The left entry between the characters/^and$/is a regular expression. Please take extra care - for example - to mark a literal dot as an explicit dot (using "[.]").Important: Make sure that the above address mapping comes first before all other address mappings. - Save and exit the file.
-
Convert the recipient_canonical file to the
Postfix database format:
postmap /etc/postfix/recipient_canonical -
Restart Postfix, for example:
sudo systemctl restart postfix
-
Now, click Save in the Email-to-Case Routing
Information page.
A pop-up will appear asking you to verify the email address you entered:
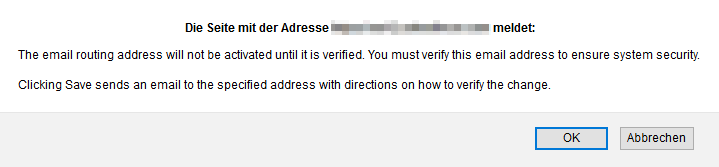
- Get the test email and follow the steps in the email to verify your email address.
-
After the successful email address verification, copy the Email
Services Address as displayed in the section Routing
Addresses at the end of the Email-to-Case
Settings overview page:
Figure 6: Email Services Address

- Edit the file /etc/postfix/recipient_canonical.
- Remove or comment out the temporary address mapping from above.
-
Map the copied Email Services Address to the
Email Address as configured in the
Email-to-Case Routing Information page. For
example:
/^support@mydomain[.]tld$/ support@n1b207qsr.1x-8cai.cs101.case.sandbox.salesforce.com - Save and exit the file.
-
Convert the recipient_canonical file to the Postfix
database format:
postmap /etc/postfix/recipient_canonical -
Restart Postfix, for example:
sudo systemctl restart postfix -
Configure that all mails to the Salesforce Email Services
Address are inbound and the rest is outbound as
follows:
- Still in the folder /etc/postfix/, create a new file named user_map
-
Edit the file and add the configuration, for example
support@n1b207qsr.1x-8cai.cs101.case.sandbox.salesforce.com inbound * outbound - Save and exit the file.
-
Convert the user_map file to the Postfix database
format:
postmap /etc/postfix/user_map -
Restart Postfix, for example:
sudo systemctl restart postfix
