The following steps are required if you are adding a custom domain to your O365
tenant.
About this task
If you have already set up the domain, then you will need
to obtain configuration details from this domain, see Getting DNS details from your Microsoft 365 tenant.
Procedure
-
In the Microsoft 365 admin center, open the menu on the
left, click Show all and then click .
-
Click + Add domain to add a new domain.
-
Enter the DNS domain that you created earlier (e.g.
demo.eperi-cdp.com). This must be a domain that you
own, and that you have the authority to change DNS for.
-
Click Use this domain.
You will be asked to verify the ownership of the domain.
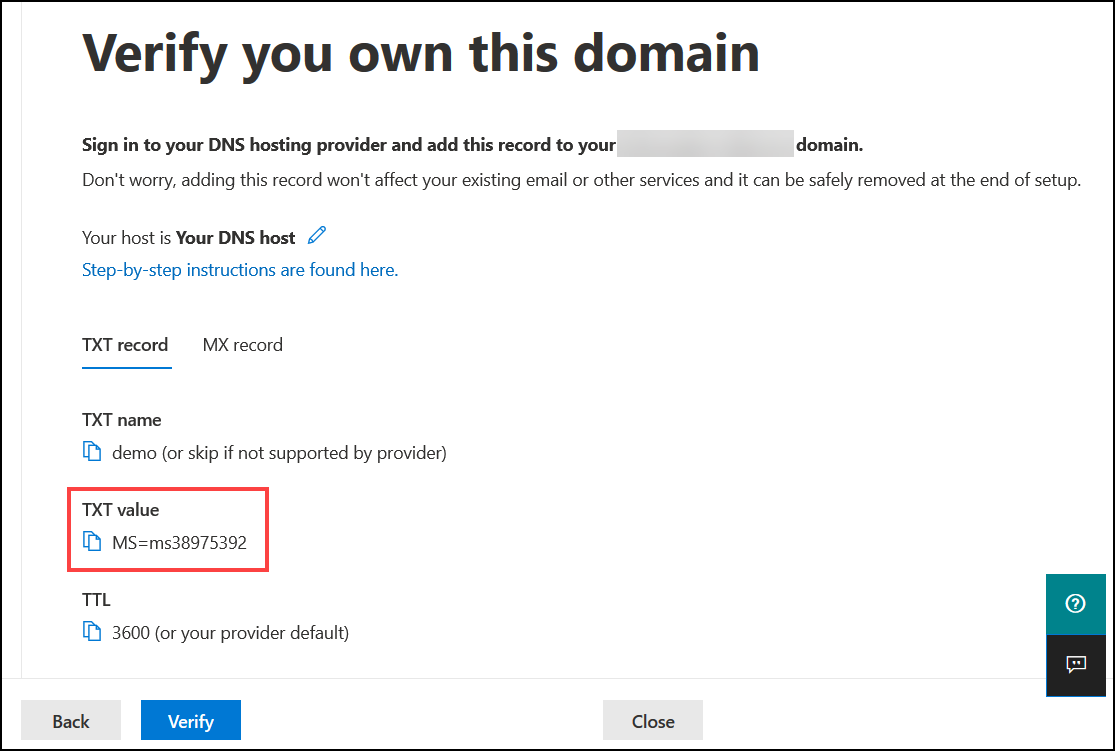
You will be given a unique TXT value,
which you need to add to your DNS (see example above).
-
Create a TXT record in DNS with the value MS=ms12345678
(based on the value you are given). As this may take a while, you can click
Close and return to this screen later to verify the
domain.
-
Once the DNS TXT record has been created, hit the Verify
button, and wait until you get confirmation.
Results
If verification works, you should see a display of the DNS
details for the domain you have added.