
Using User Context for OOS Document Editing
The following instructions describe the configuration of setting up Microsoft 365 to display the last editor of a document in SharePoint. It is done in the Microsoft 365 tenant as well as inside eperi sEcure Platform. You will need to log into the tenant as a full administrator.
Procedure
-
You need a Registered App on the Azure Portal. You can re-use the App which is already
configured for Background Indexing. Follow these steps to edit the
App:
- In the Microsoft 365 Admin Center, select Show all.
- Select Azure Active Directory. This opens the Azure Active Directory Admin Center.
- In the Azure Active Directory Admin Center, click on Azure Active Directory.
- Choose App Registrations from the left-hand navigation pane on the page that opens.
- Select your previously registered app.
- In the app's settings, choose Authentication from the left-hand navigation pane.
-
Configure the App in the Azure Portal as per the following instructions:
- Under Platform configurations, click on Add a platform
- In the menu that opens, select Web
- Configure a corresponding redirect URI for web applications: https://login.<gwhost>/_auth_
- Other settings for redirect URI can be default.
-
In eperi sEcure Platform, a Proxy which serves as endpoint for the redirect URI needs to be configured. If you have already configured a Reverse Proxy for accessing Microsoft 365, you don't need to do anything.
Otherwise, please follow the steps below:
- Create a new App in the eperi sEcure Platform of the type Login Reverse Proxy App.
- Create an SSL-enabled Reverse Proxy and assign the new App to the Proxy.
- Ensure that the proxy service's SSL certificate is suitable for the redirect URI.
- Now start the Proxy on port 443.
Results
What to do next
- If users access a OneDrive or SharePoint Document via a shared link, they will be
redirected to the selection page, where they can choose to access the document anonymously or
via a Microsoft 365 account for the corresponding tenant. Anonymous access can be prohibited by
setting the following Advanced Setting: Anoymous user is
allowed to modify shared file to false.
Figure 1: Default Shared Link Access Page 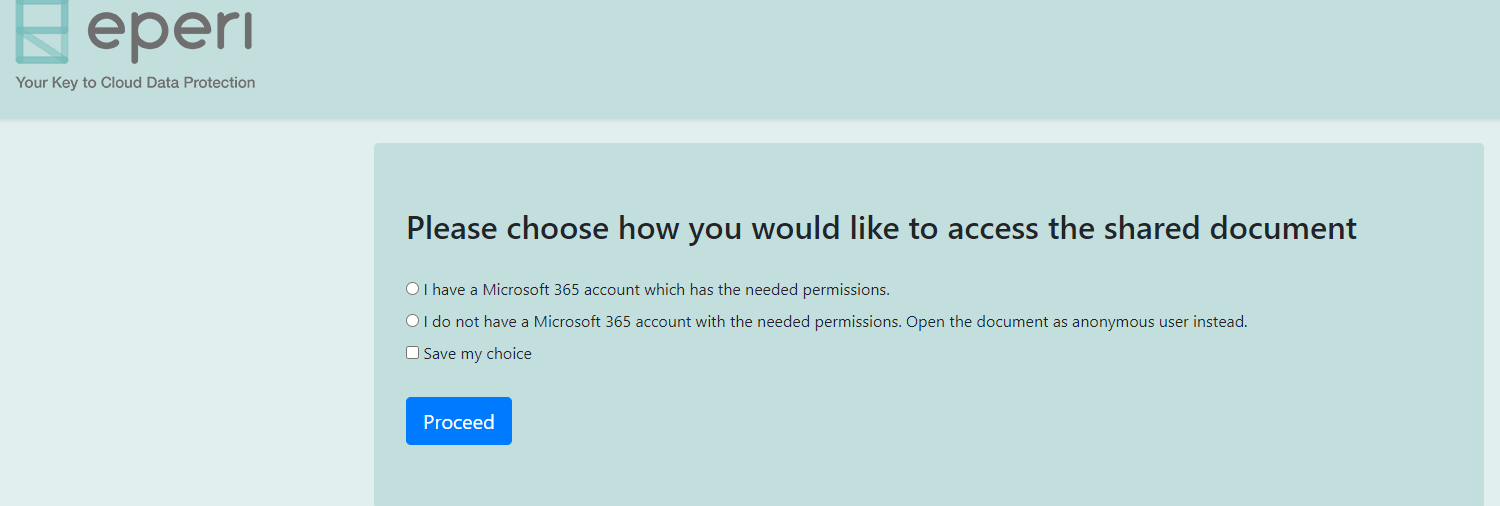
- Customizing the selection page: To replace the default (eperi-branded) page with your own, you can place a file called sharedLink.html
into the etc folder inside the eperi sEcure Platform deployment directory (usually /opt/eperi/gateway/tomcat/webapps/ROOT/etc). The
file needs to fulfill the following requirements in order to be functional:
- The document sends post data (content-type: application/x-www-form-urlencoded). The target address needs to be :url:, which is replaced automatically.
- The POST request must send a parameter called Mode with the value 1 for access via a M365 account, or 2 for anonymous access.
- The POST request can optionally send a parameter savesettings, whether the mode selection should be saved or not.
- Example:
<html>
   <body>
      <form name="form" method="POST" action=":url:">
         <br> <input id="m365access" type="radio" name="Mode" value="1" onclick="" required>
            <label for="m365access">I have a Microsoft 365 account which has the needed permissions.</label>
         <br>
         <input id="anonmyousaccess" type="radio" name="Mode" value="2" onclick="">
            <label for="anonmyousaccess">I do not have a Microsoft 365 account with the needed permissions.
            Open the document as anonymous user instead.</label>
         <br>
        <input id="savesettings" type="checkbox" name="savesettings"
          value="save" >
          <label for="savesettings">Save my choice</label>
        <br>
        <br>
        <button id="continueButton" class="btn btn-lg btn-primary"  role="button" >Proceed</button>
      </form>
   </body>
</html>